Thursday, September 26, 2013

Minnie Mouse Costume

"M.I.C.K.E.Y   M.O.U.S.E  Its the Mickey Mouse Clubhouse...
come inside there's fun inside"
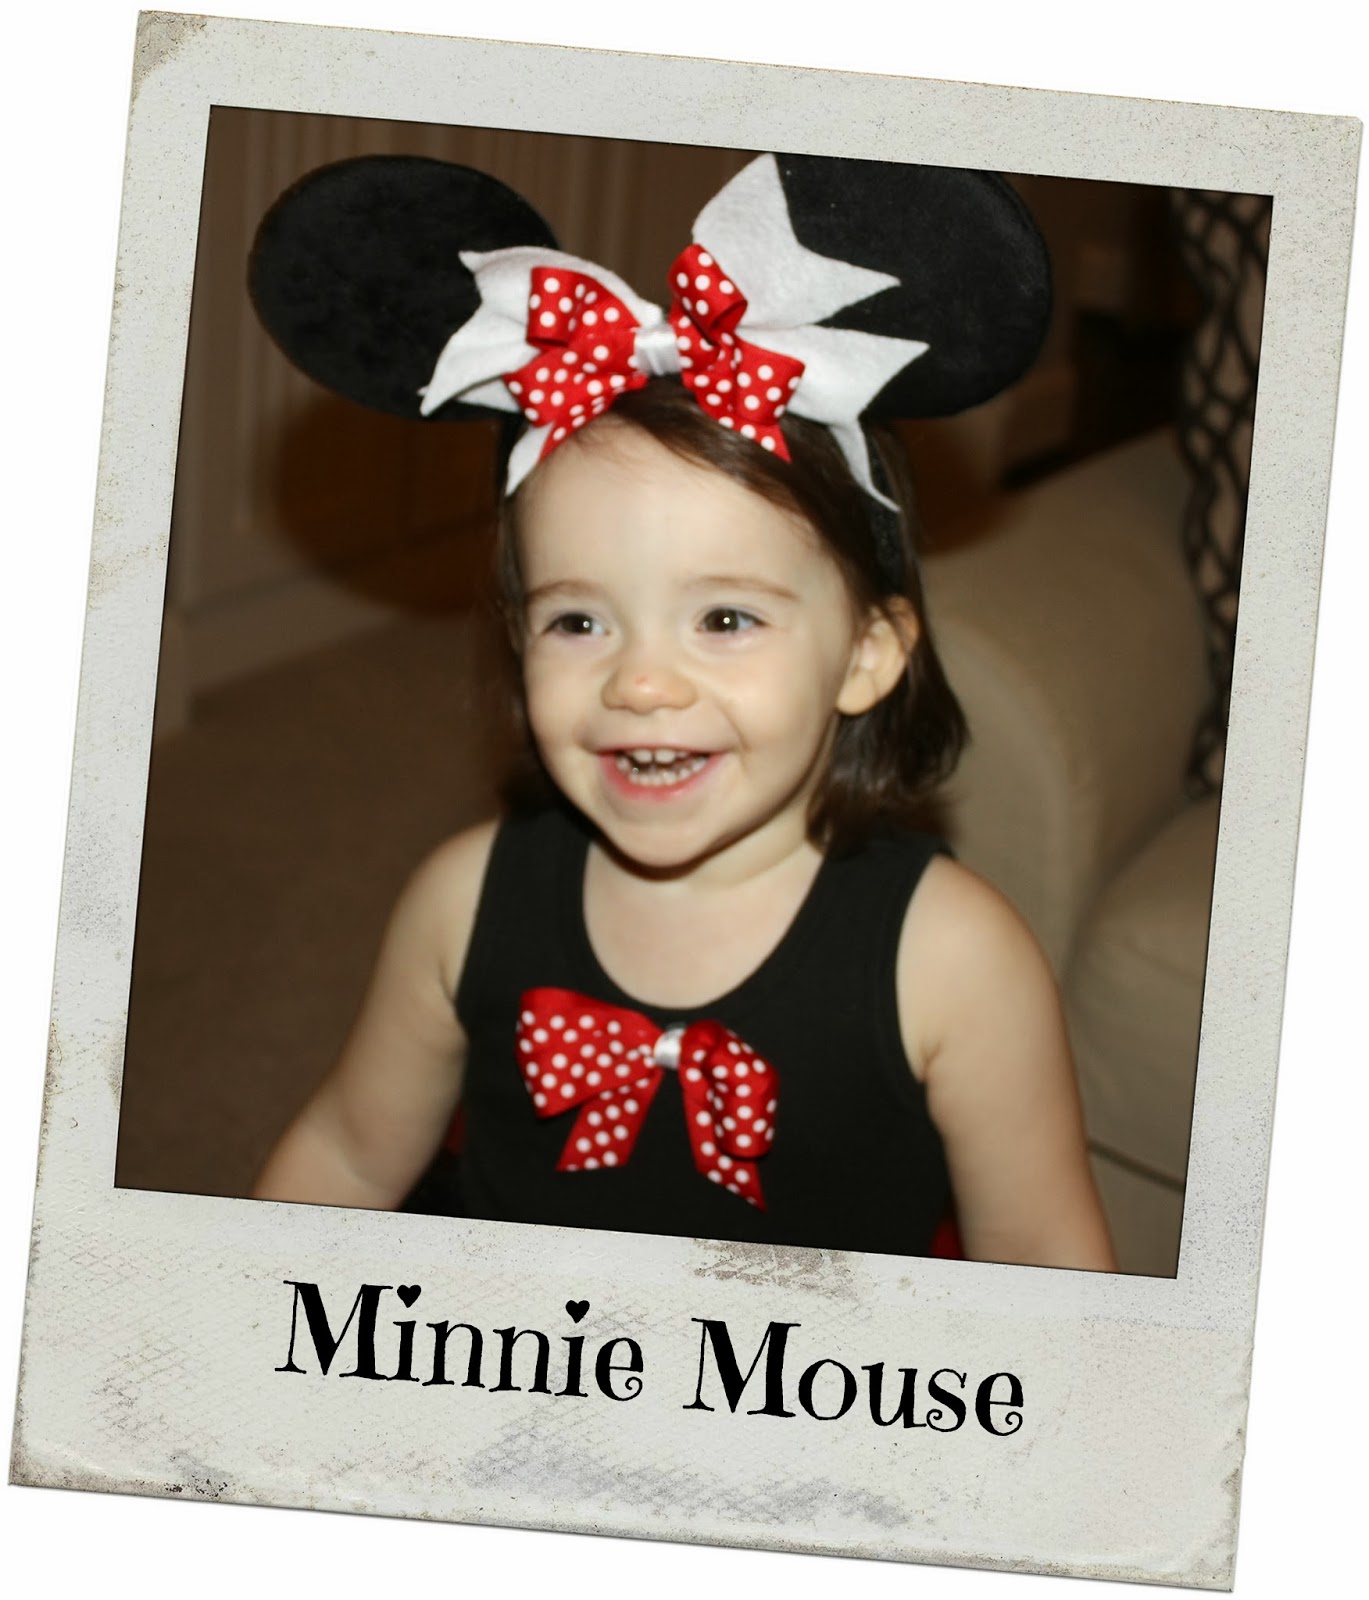
That song is constantly stuck in my head because Avery (2) LOVES Mickey Mouse Clubhouse!!  Who is her favorite character??....
Minnie Mouse.
So, it seemed appropriate that we make her a Minnie Mouse Costume for Halloween.

My mom "Grammy" is super talented and helps us make all kinds of fun things for Avery.  Last year she and I made Avery's Peacock costume.  You can read more about that HERE


So this year she came and helped us make Minnie Mouse!
We went to Hobby Lobby and got the following material:


2 yards of Red Tulle 
2 yards of Black Tulle 
Red Glitter Tulle
Black tank dress (used 40% off coupon)
1/4 yard white Felt
Minnie Mouse Ribbon
Red Polka Dot Ribbon
White small grosgrain ribbon
1/4 inch elastic

To make the tutu:
All you do is cut the elastic to the size you want for the waistband, cut the tulle (we cut it in strips that were 25" long and 4" wide) and tie the tulle on the elastic in 1 knot in the middle of the 25" so that its basically 2 pieces hanging off the elastic at 12.5" each.  Then we cut out circles in the white felt and used a glue gun to put them on the tutu.
Simple as that!  

To make the shirt:
All we needed to do was add a bow.  We used the red polka dot ribbon from Hobby Lobby.  Here is a good bow tutorial

We paired the top and tutu with black pants she had and some cute glitter shoes we already had.

To make the ears:
We ordered 3 pairs on Amazon here.  Both Geoff and I will also be wearing ears when we go trick or treating.  I like costumes where we can be part of the theme, but can be super simple...like wear ears only :)
We added bows to 2 of them so Avery and I will have Minnie Ears and Geoff will have Mickey Ears.


I am going to make her a Minnie Mouse trick or treat pumpkin bucket.  I will buy one of the cheap jack o lantern ones and paint it/add ears.  Once that is done I will add an update showing the end result.

What are your kids going as for Halloween?

Read More »

Friday, September 20, 2013

Baking fun...Pumpkin Bread

I love this time of year...weather, food, family, yummy smells, pumpkin!!

Avery and I baked together for the first time and had so much fun!  We burned the House of Hargrove Harvest Spice candle to set the mood and baked one of my favs....
pumpkin bread!


Here are some pictures of Miss A...she was a huge help


It seems that she loved it too :)


look at that face!

I have had lots of pumpkin bread in the past, but this is by far my fav recipe.  
ENJOY!
Read More »

BARN SALE TOMORROW

Our September Barn Sale is tomorrow!  
We are stocked with all kinds of goodies!  Come check us out!

Click HERE for a sneak peek
Click HERE for directions


Read More »

Tuesday, September 17, 2013

Be our guest

We moved into our house about a year ago and every room was "done"...meaning the furniture was moved over from the other house, but now I am all about tweaking all the rooms to give them that special touch.  This house has bigger rooms and taller ceilings so a lot of my stuff looked dwarfed.  My curtains were too short, lamps too small, etc.  I have been working on the guest room lately and am so so close to being done with this room.  I am ready!

Our guest room is downstairs off the kitchen and the mudroom.  Here is a view of our mudroom.


The door straight ahead is our laundry room and to the right is a door out to the garage.  These are the back stairs that lead up to the game room.


Here is a view facing the opposite way.  Our mudroom cubbies are on the right and the kitchen is straight ahead (laundry room directly behind).  The guest room is off to the right.


This is a view of the nook when you turn off the mudroom hallway.  There is a door straight ahead to the bathroom and the door to the right goes into the guest room.
The left side is a wall that I did in old barn wood looking wallpaper....I LOVE it!


Here is another picture.  You can find the wallpaper here


Welcome to the guest room....


As I mentioned I have been doing a lot of work in here.  Below is what it looked like for awhile, but it needed some work.  The nightstands were too small, I didn't like the bed skirt at all and it needed some more pillows...just a little "shabby chic" touch!

BEFORE
AFTER:
Click HERE for details on how I made the bed skirt from a cheap Walmart bed skirt!

Here is a before & after with the new bed skirt


Here is a before & after with the new nightstands


details on the nightstands


I have also added an old door behind one of the nightstands to add character and height.  I need to find another one:


Photoshop version of what it will look like with doors on each side.


I still think eventually I want to have a headboard made out of an old mantle.  I just love the way they look.   If I do that I will move frame/mirror above the bed now to the other wall.  There is plenty of room for it.
Here are some inspiration photos of mantle headboards:


Below is a view of the other side of the room.  I LOVE the curtains.  They are the Smocked Drape curtains from Pottery Barn.  You can find them HERE


I still want to get some new decor and a mirror to go on/above this dresser.  It is a robin egg blue dresser that looks a different color in person than in this photo.


Here is the mirror I have ordered to go above the dresser


Here is a little photo shop action to show what it will look like!  The mirror is actually taller than that.  Will go almost to the ceiling.


Some details around the room...


Below shows the nook connecting the guest room to the bathroom. There are closest on both sides of this nook/walkway leading into the attached bathroom. 


 The guest bathroom has 3 doors.  One that attaches to the bedroom, one that goes out into the hallway and one that goes out to the patio/backyard.  This will also be the pool bath when we get a pool one day.

The bathroom has a vintage, clean feel.  White vintage inspired tile on the floor, white subway tile in the shower, Carrera marble for the counter tops, glass knobs, metal ceiling tin wall art, old window for the window treatment and spa like colors of grey, white and robin egg blue.


I was so excited when I found the perfect old window to use as the window treatment.  Below is the before and after:


Bathroom details:...nothing in my house is complete without some crown details.
The "vase" is actually a Ralph Lauren trashcan that I had to have...

Here is the matching Ralph Lauren soap dispenser.  All my fav things....crown/white/monogram!
The plate also has a crown :)


Here is a view from the bathroom back into the bedroom.


When I get the few other projects complete I will post updates on here.  
I want everything ready for the holidays because we host lots of guests!


Read More »

Wednesday, August 21, 2013

Ruffles with a side of coffee

I have always loved being inspired by top of the line/expensive things and then finding a way to do it for less.  That has been my passion, what drives me and the inspiration behind House of Hargrove (also great for my marriage :) ).
Every now and then you find that piece that you just have to splurge on, BUT most of the time you can find a way to get the "look for less".

This brings me to the ruffled bed skirt... 
 I have been dying for one, but the prices I was finding were $175-250+ and I was NOT going to pay that for a bed skirt.  I love POM POM bedding, but not the prices.  

INSPIRATION BED SKIRTS:
Can be found HERE


Pom Pom bedding can be found HERE


So....I went on the hunt for a knockoff.
I was shocked when I found the winner at Walmart!!
It is only $33.47!!!  It was not linen, but for that price I knew I could make it work.
Here she is:
Greenland Multi Ruffle Bed Skirt found HERE and HERE.

Now, I didn't want it to be white so I decided to try coffee staining for the first time.  I had nothing to loose!  I don't know that I did this the perfect way, but it worked for me.  Since there was a lot of fabric I filled my utility sink until all of the fabric was covered in water.  Then I ended up making 36 cups of coffee (3 batches)!  I used about 3/4 of a new container of Folgers Decaf Coffee.   I poured all 36 cups in the sink with the water and stirred it all up.  I let the fabric soak over night.
I had no idea what to expect, but I was really excited when I saw what I saw!
Here is the result (still soaking wet here):

I thought it was a great color and really looked antique.  I then put it in the washer on the rinse/spin cycle (no soap).  This helped get any coffee grains off.  Then I dried it and put it on the bed!

I think it made a huge difference in my guest room.


I also added some new pillows I had in another room and added some new decor to the wall.  I have big plans for this room and it is definitely in the "working stages".  I want some chippy chests as the side tables.  
Something like this:


I also will be using a fireplace mantel as a headboard.  I want to fill the middle with linen and tuft it.
 Something like this:


Anyway, stay tuned for more updates to the room.

BTW the room smells so good!!  It looks inviting and smells like coffee....perfect for a house guest!


Read More »