

Been busy working on more projects in Avery's Big Girl room.
I have completed one wall in her room, but the others need work!
Here is the completed wall...

This side of the room is a hot mess!

I have a plan on what I want to do over here, but now I just need to make it happen.
One of the challenges I am dealing with is I have 4 rooms I am working on at the same time (moving guest room upstairs, making old guest room the playroom, changing Avery's nursery to Braden's Nursery and finishing this room). Each room, helps the other room. For example, the chest in Avery's Nursery is moving into this room, but I don't want to do that until I am ready to take down that room, etc.
The other challenge I have been working with is adding color to this side of the room. I LOVE the shabby chic, white look, BUT I don't want it to look all washed out. I wanted Avery's big girl room to have more color. I LOVE pink and brown and really debated doing that in her room again, BUT that was the color scheme in the nursery so I wanted to do something a little bit different.
The ceilings in our new home are really tall so I am always looking for things to add height to counter tops, walls, furniture, etc. I LOVE fabric banners. I see tons of them on Pinterest used in photo shoots, decorating, etc so I decided to make one for Avery's room! It would add height and color! PERFECT!
Here is an inspiration picture I found on Pinterest...this banner is on ETSY

Here is another inspiration picture found on The Lovely Cupboard with a "how to" on making one.

So it was time for me to get started. I wanted to use something a little different to hang the banner on other than just a string so I found the perfect thing....the top of washstands!
I made Avery's nightstands out of old washstands and removed the tops of them because I didn't want them behind her nightstands so I had a top laying around that was perfect!

Here it is! I just tied a twine string between the 2 posts and then tied the fabric strips to it.

I used strips of fabric that were left over from other projects in Avery's rooms...pillows, window treatments, etc.
TIP: Instead of cutting all the fabric if you just make a tiny snip in the edge of the fabric the width you want the strip to be and pull it will rip in perfect strips! Saves a lot of time instead of cutting all the strips with scissors!
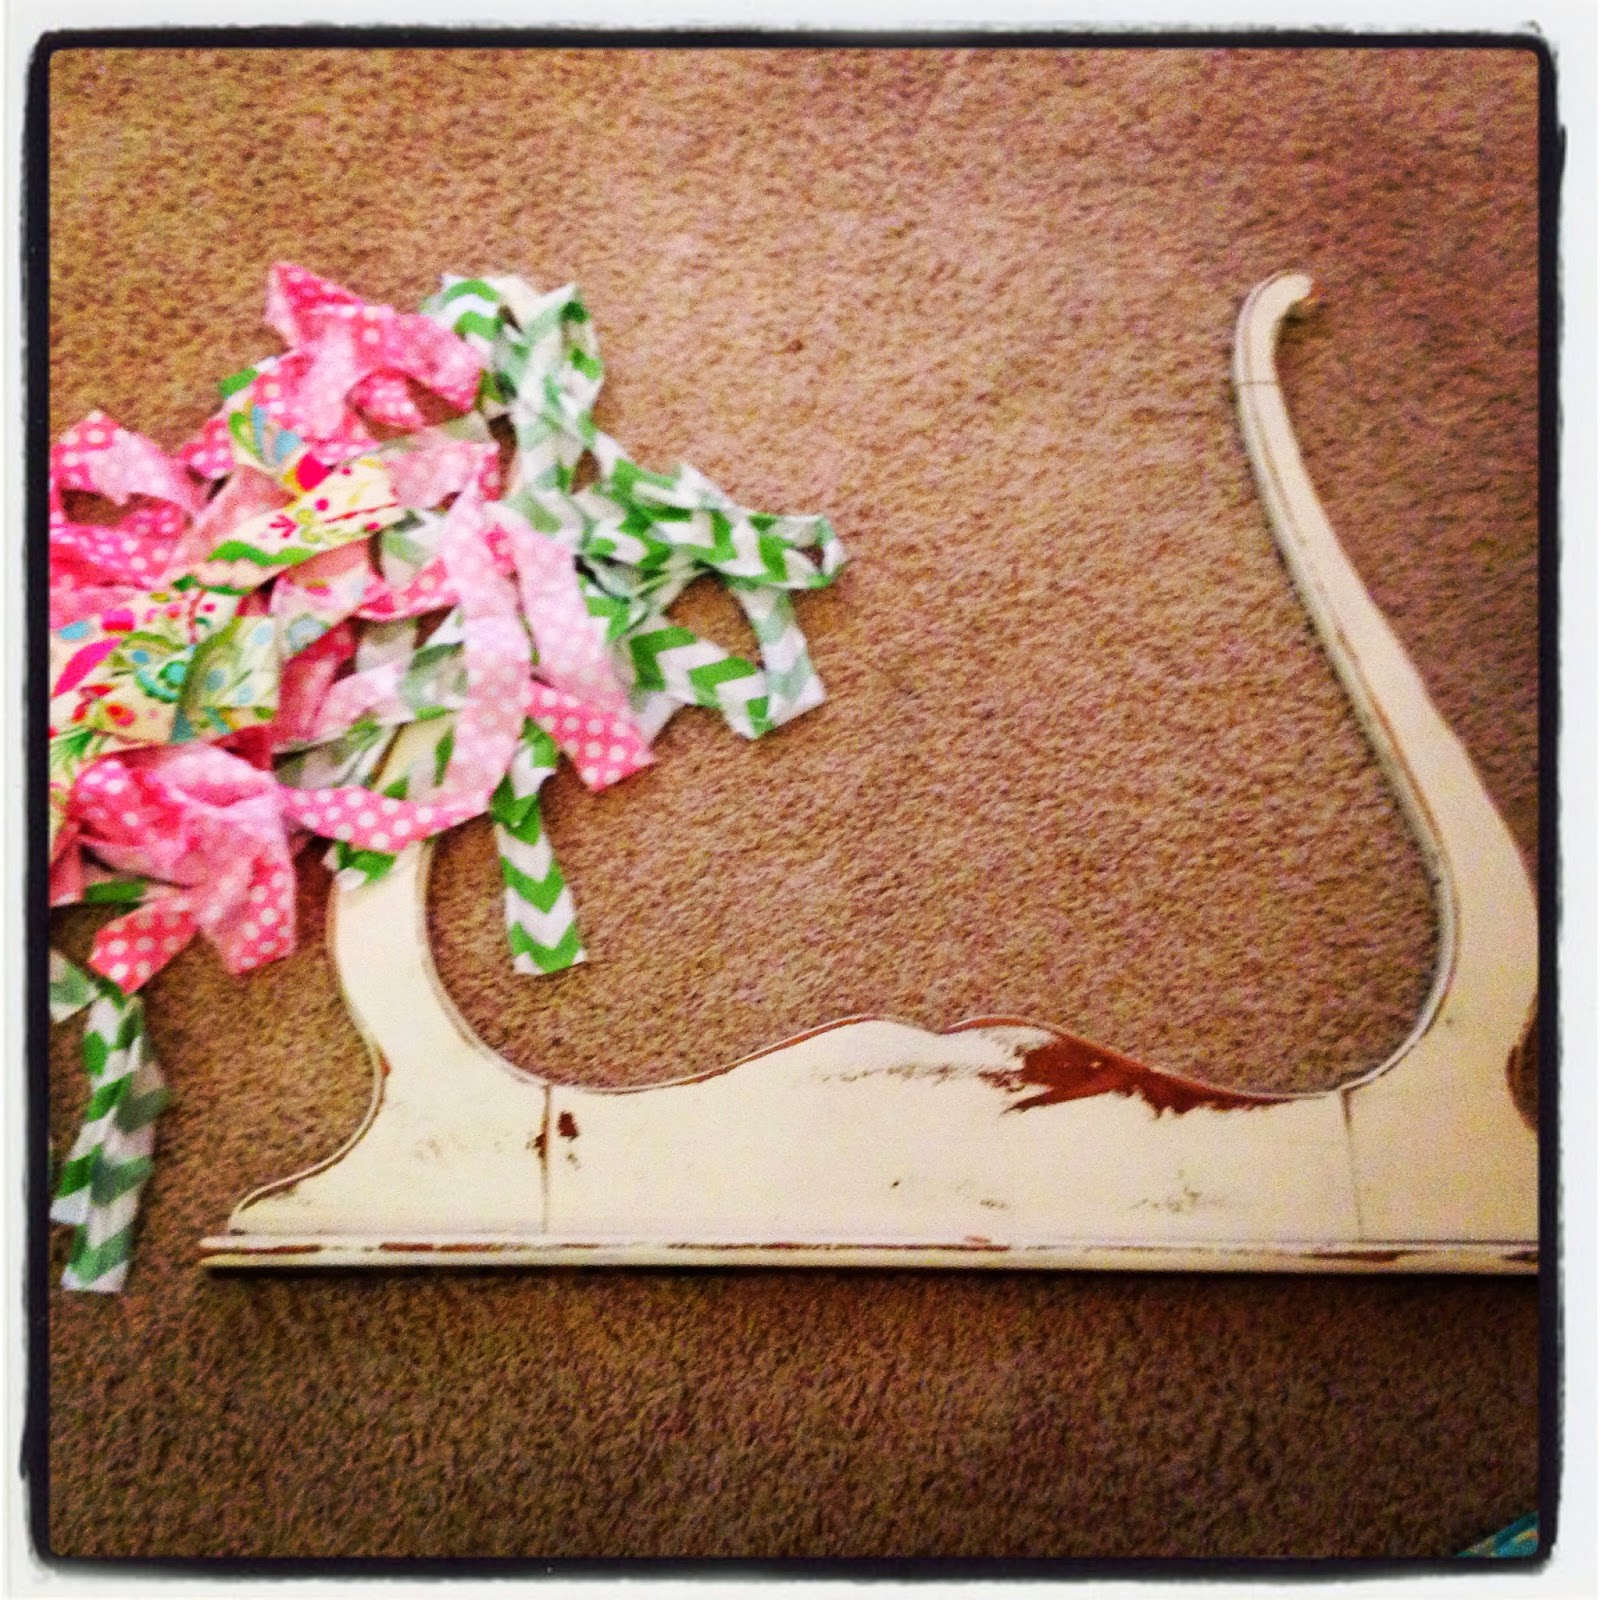
Then I went back in and added strips of pretty ribbon that coordinated to add a little something extra

Here is the final product! I LOVE the way it turned out!! Super cheap project...basically FREE (I had the fabric strips, ribbon and washstand top lying around)

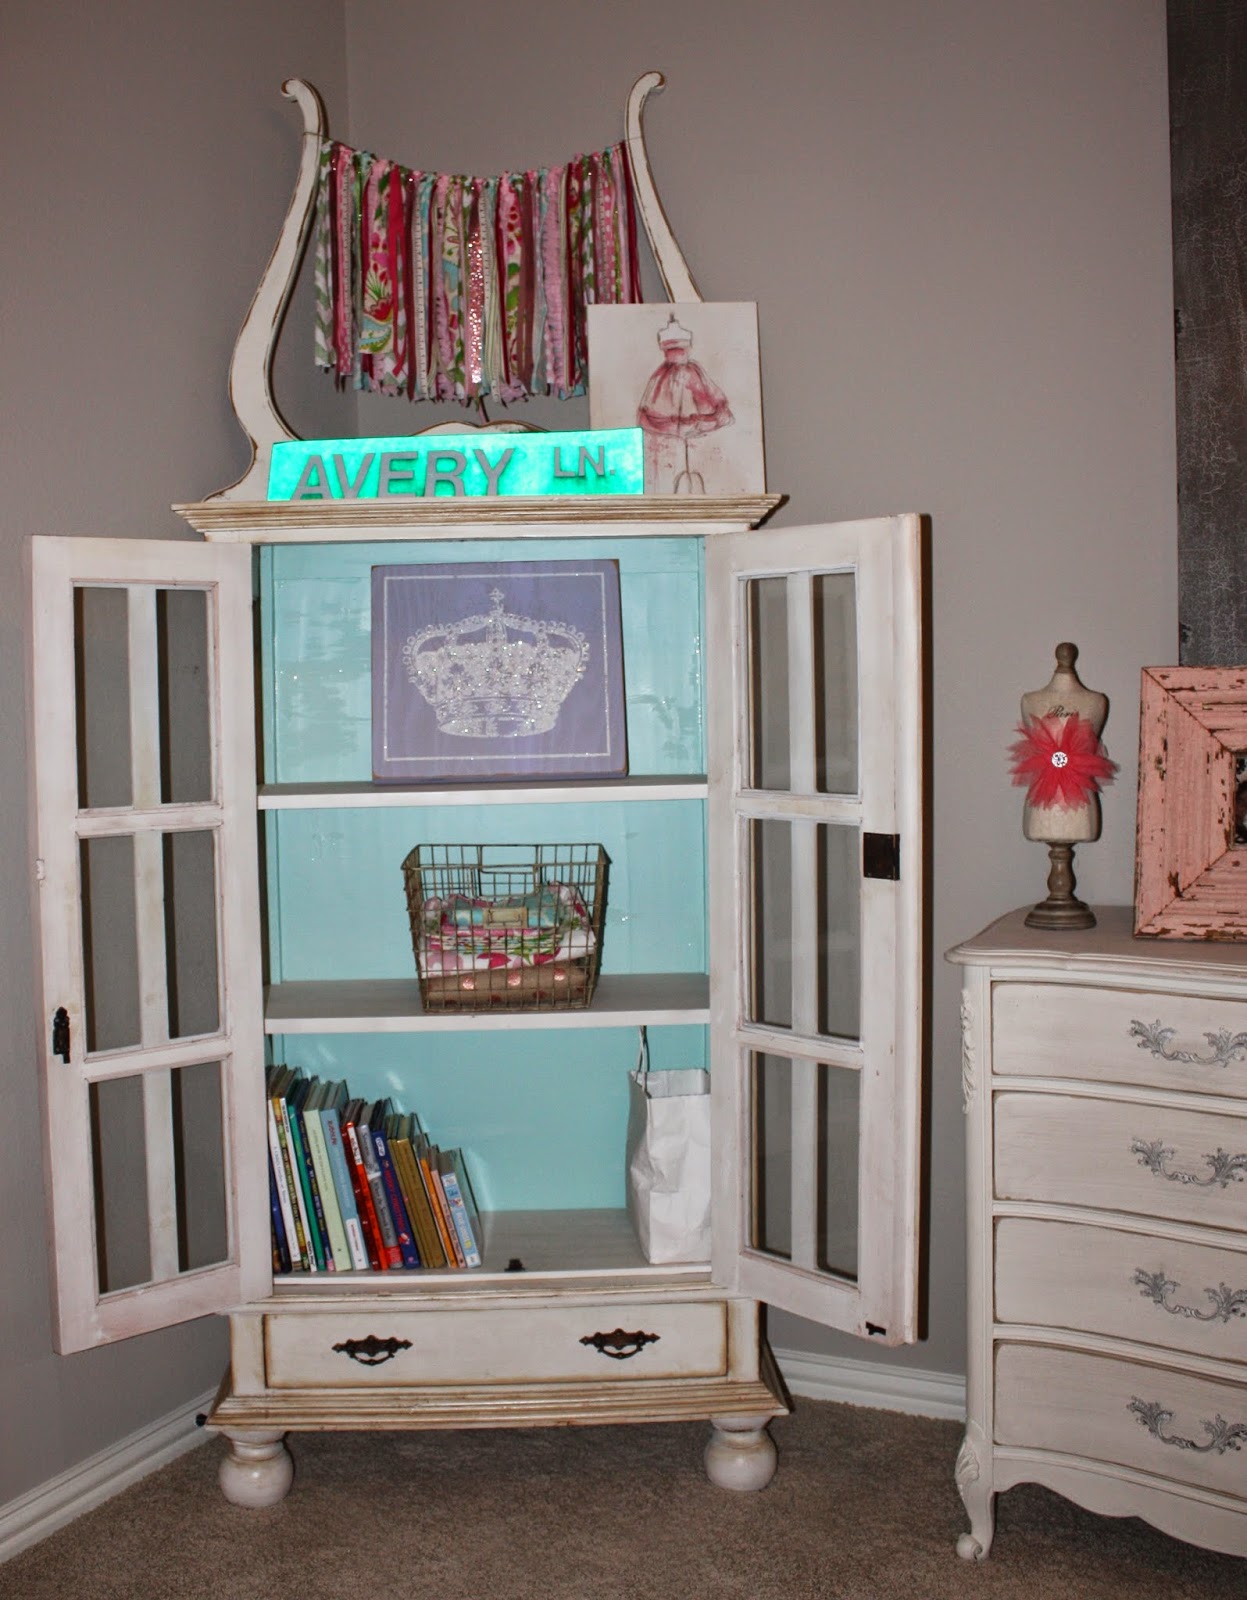
Here it is in her room with her SIGN that we love!!

This new fabric banner is sitting on top of Avery's cabinet which was our next project!
Like I mentioned earlier I needed to add more color to this wall so one of the ways to do that was to paint the inside of this cabinet blue!
Last night Avery helped me and we got to work!
TIP: Painting the back of furniture is such a great way to add a pop of color without doing too much!
Here is what it looked like before...


And AFTER with the blue paint inside...

This piece of the room is coming together...next up hanging her new mirror, painting part of the wall, putting up molding and more colorful splashes....stay tuned!

Girl - you are so talented!!!! LOVING how her room!!! Thanks so much for linking up! :)
ReplyDeleteThanks :)!! Love the link up party!
DeleteOh my goodness! I love the room! This inspires me to be more creative!
ReplyDeleteI love the completed wall of your daughter's room and the overall creativity. It looks great! :)
ReplyDeleteSo beautiful and timeless!
ReplyDeleteStopping by from the link up. Looks great so far, can't see what you do with the rest!
ReplyDeleteCOme by and say hi www.itsagirlgirlworld.blogspot.com
I adore everything!!! Especially the ribbon and washstand top! You've done a great job!!
ReplyDelete