


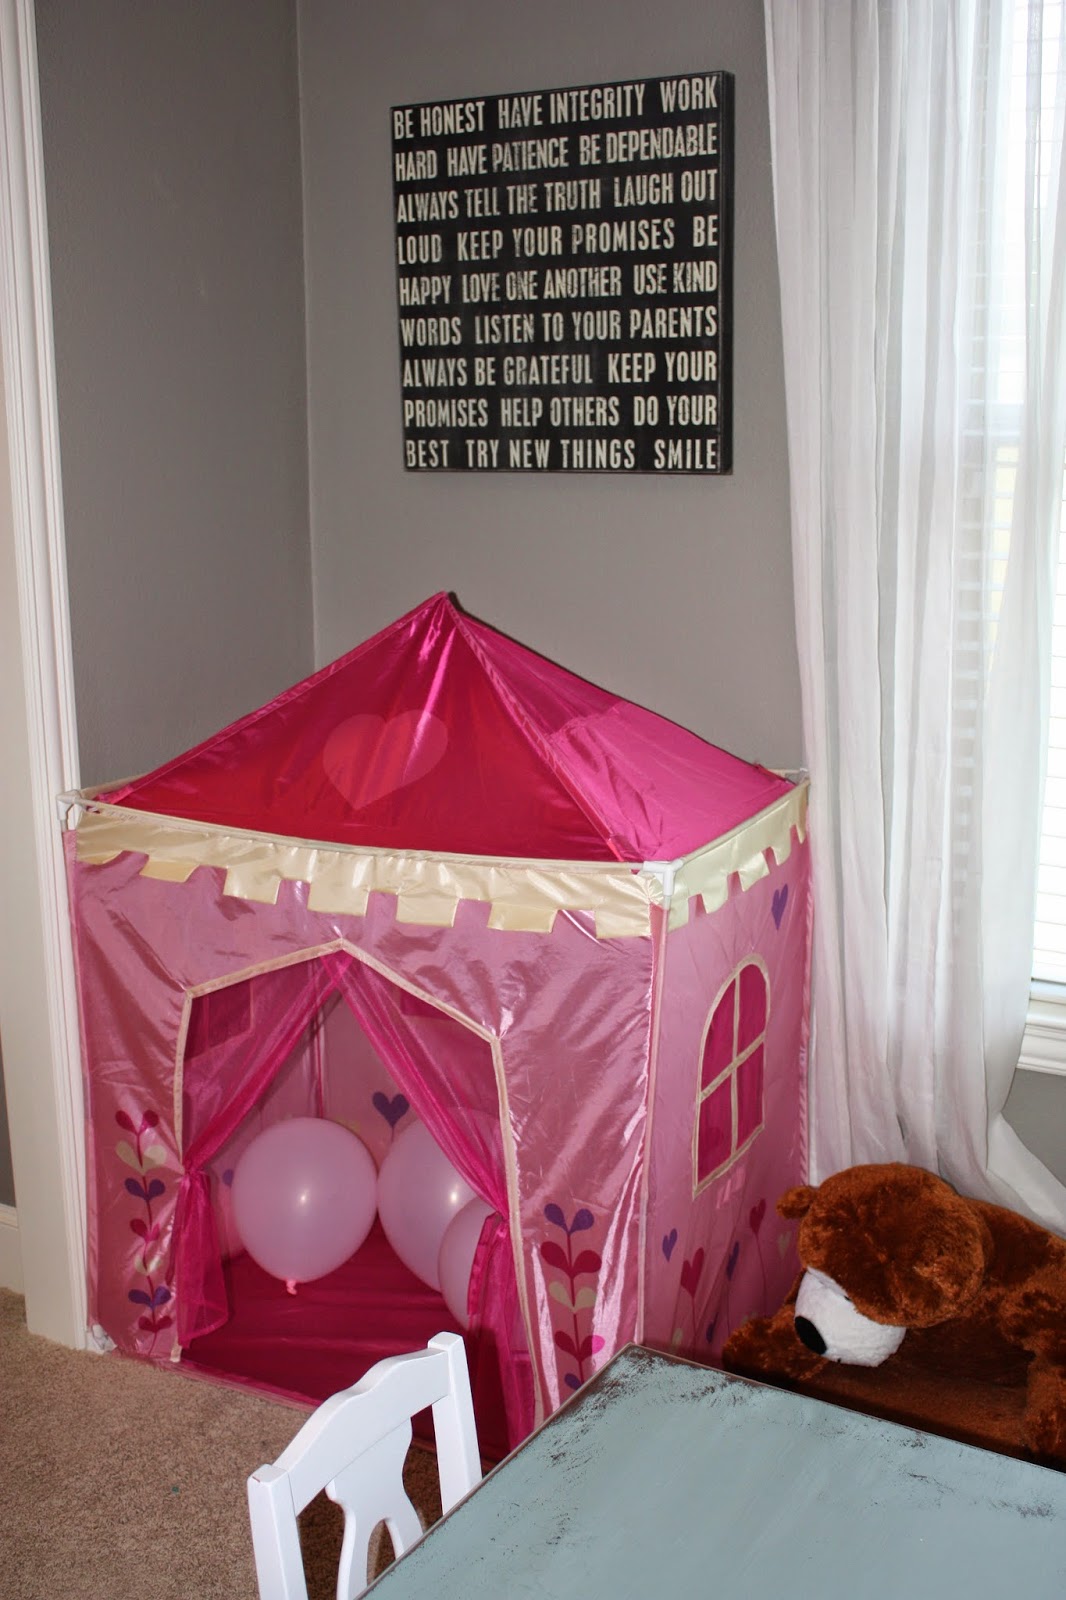
Avery is getting bigger and so are her toys. I have been getting tired of her "castle" living in our living room along with all her other toys :)
With the combo of this and another baby on the way it was time to transform our downstairs guest room into the kids playroom. Click HERE for details on the plan...and then see below for how it turned out.
I have been busy this summer getting it all ready and it is finally complete!
Welcome to our Playroom
I painted this small wall as you walk in with chalkboard paint.


I am super excited about decorating this wall with events in A&B's life and holidays...also of course the kids coloring it as well
%2B(12).JPG)
%2B(26).JPG)


I had this vintage reproduction wash stand that was perfect for all her stuffed animals.

Here is the other side of the room.
The shelves for the books are from Ikea. They are the Ribba Picture ledge and work great to hold all the books! I got the 45" shelves and they were $14.99 each.


 These are the Anywhere chairs from Pottery Barn Kids. We gave Avery hers for her 3rd birthday and Braden's will be his Christmas gift. I ordered it early because it was on sale and Avery's friends can enjoy it until he gets here.

The United States art is from Hobby Lobby and I bought it during their 50% off sale. It was $24.99.
I hung a piece of twine between 2 nails to hang her art on. As she begins to make more art I will probably have to add another string below to hold all her masterpieces :)
 Here is a view of the other side of the room. I LOVE that her big toys (castle, easel & kitchen) are now out of our living room!
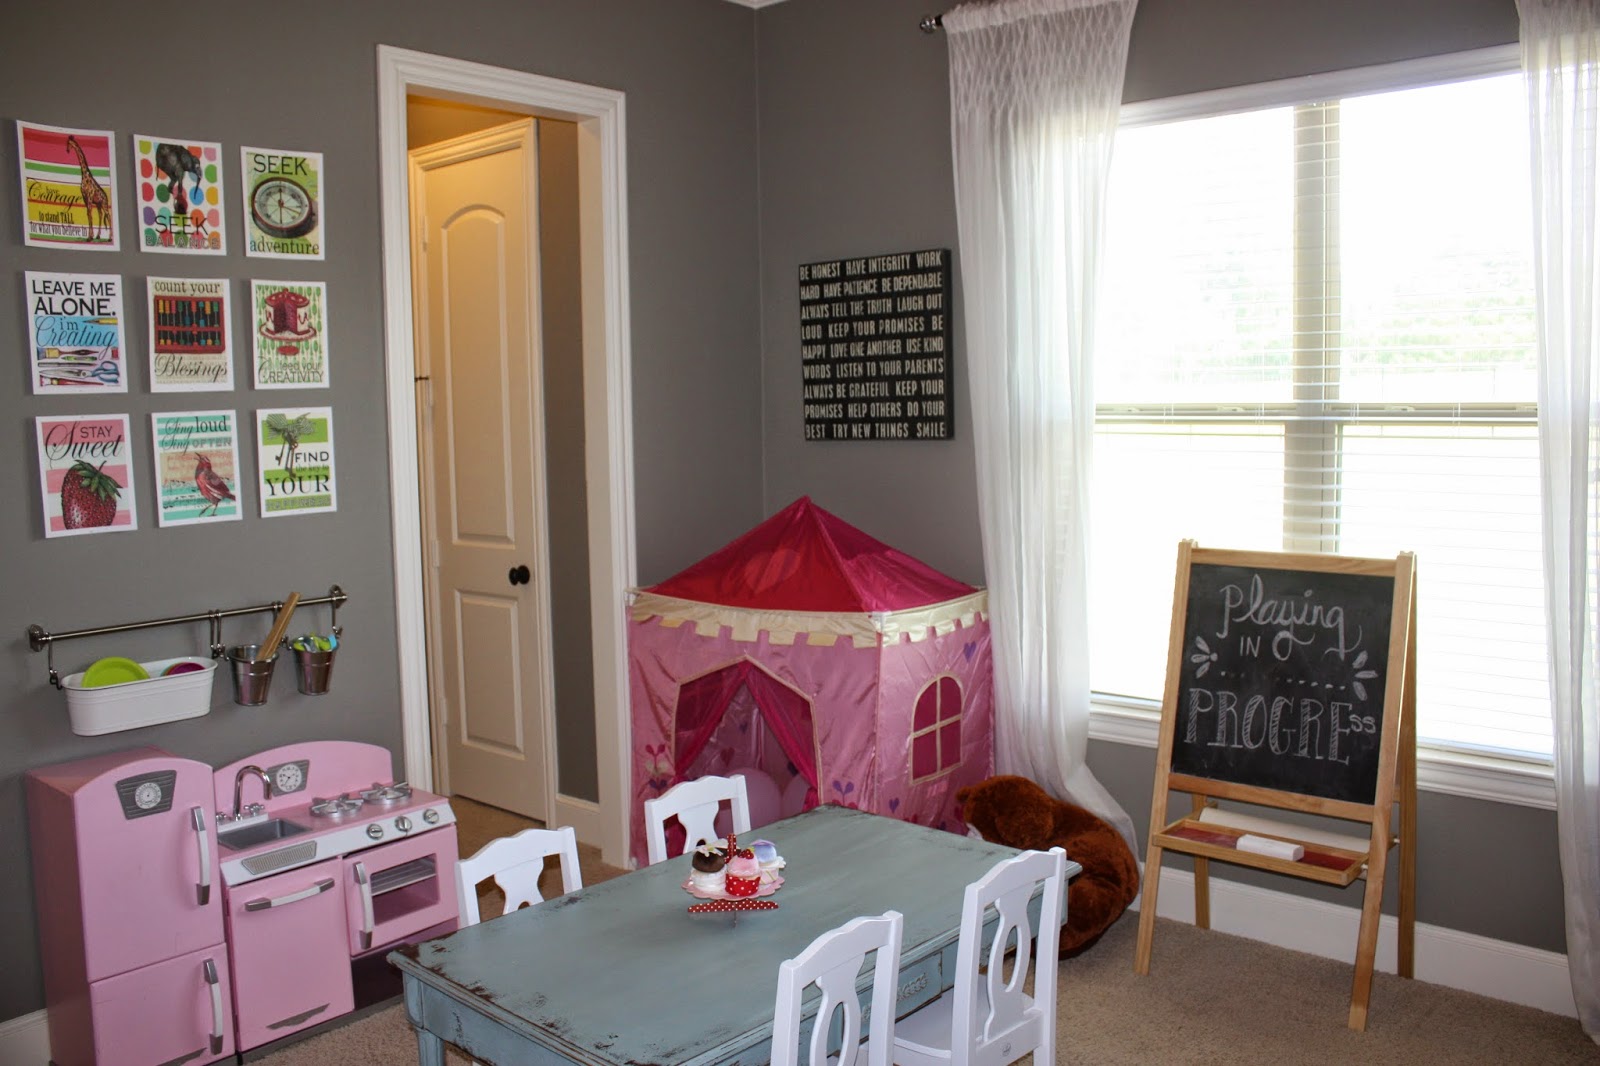
This easel is from Ikea. It was $14.99 and has a dry erase board on the other side. She loves it!


The kitchen was her 2 year old birthday gift. She loves to "cook" in it. I found this great storage piece from IKEA. It is the FINTORP collection and it is perfect to hold all her "utensils".


The art is by Drooz Studio. I love all their prints! You can find them HERE.

I searched high and low for the perfect kids table and finally found it! I love the way it turned out. It was a regular sized table and I refinished it and cut the legs down. Click HERE for details on the transformation. The chairs are Brighton from Kidkraft. They were $42.99 each. Originally I was going to get the Sundvik chairs in grey from Ikea, but they were way too small!!
I have been busy this summer getting it all ready and it is finally complete!
Welcome to our Playroom
I painted this small wall as you walk in with chalkboard paint.
I am super excited about decorating this wall with events in A&B's life and holidays...also of course the kids coloring it as well
Here is a view as you enter the room.
This is the main media wall. The bookshelves are from Ikea. They were $64.99 each. They are perfect for storing a large amount of toys. I got the baskets at Target. Once Braden is here I will be adding 2 large canvases of Avery & Braden together over each bookshelf on each side of the I LOVE U art.
Great storage inside of the media piece of furniture. Great for her bigger items.
Click HERE to learn how to make this art
Click HERE for details on these baskets and how to make the chalkboard labels.
I had this vintage reproduction wash stand that was perfect for all her stuffed animals.
The shelves for the books are from Ikea. They are the Ribba Picture ledge and work great to hold all the books! I got the 45" shelves and they were $14.99 each.
The United States art is from Hobby Lobby and I bought it during their 50% off sale. It was $24.99.
I hung a piece of twine between 2 nails to hang her art on. As she begins to make more art I will probably have to add another string below to hold all her masterpieces :)
This easel is from Ikea. It was $14.99 and has a dry erase board on the other side. She loves it!
The kitchen was her 2 year old birthday gift. She loves to "cook" in it. I found this great storage piece from IKEA. It is the FINTORP collection and it is perfect to hold all her "utensils".
The art is by Drooz Studio. I love all their prints! You can find them HERE.
I searched high and low for the perfect kids table and finally found it! I love the way it turned out. It was a regular sized table and I refinished it and cut the legs down. Click HERE for details on the transformation. The chairs are Brighton from Kidkraft. They were $42.99 each. Originally I was going to get the Sundvik chairs in grey from Ikea, but they were way too small!!


I fell in love with this petifore cake stand at Ikea. I LOVE cake stands and this was just too cute for $7.99!

This little hallway leads into the connecting bathroom and it has closets on each side. It is perfect storage for all of the toys and it is awesome having a bathroom right there!!


Here is the closet on the right side of the hallway. It is all shelving and is perfect for all the toys I don't want out in the playroom. Mostly the toys with multiple pieces or that are messy and need parent supervision.

All of her tall toys fit on the bottom of this closet like her shopping cart, baby stroller, vacuum, etc.

Here is a view from the bathroom back into the playroom.

Like I mentioned earlier, this room used to be the guest room. It wasn't getting nearly the use that they playroom is now getting so we moved it upstairs. Here is a link to the new guest room. Below are side by side pics showing the transformation.

Here is what the original plan looked like and the final product.


Do you have instructions on doing your chalk wall? Did you have to sand the texture down on the wall?
ReplyDeleteHi Skylar- some people do sand the texture down but I didn't. I just painted over my regular wall with texture. I did this so if I ever want to repaint one day I dont have to get it retextured too. Yes, it is a little bumpy but that doesn't bother me at all. We can all still write on it and have fun with it. Just get chalkboard paint and paint like normal.
DeleteWhat size plywood do you use for abc picture?
ReplyDeleteIt really depends on the size of the letters you use. I placed them all on the plywood how I wanted and then I cut it down. Mine is 30x30
DeleteWhere do you get your barnwood
ReplyDeleteI have a pile of it but I also have a local shop in town that I go to for my frames sometimes.
DeleteWhat size silver utensil holder did you use for kitchen
ReplyDeleteWhat size hook and rails. We have that same kitchen and love that idea.
ReplyDelete